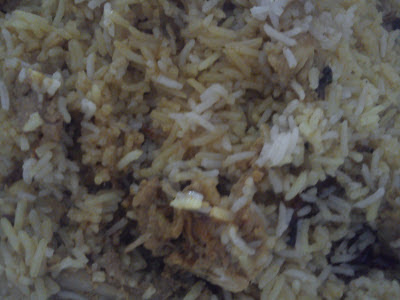
Malabar Chicken/ Mutton Dum Biryani
This is a very famous Kerala Dish.
I was not a very big fan of dum biryani. One day, my husband took me to one of the best restaurant in Singapore called swadisht. We ordered malabar mutton biryani and it was so tasty that we forgot the entire world. Even after getting back home i was still thinking about this dish and had a question in my mind if i can also prepare it. I watched many youtube videos and read many sites with this recipe. Finally, i was ready with the recipe by combining the ingredients from all the videos and sites that i felt was suitable.
My Father loves this a lot. And i gave it a first try when he had come to my house to Singapore for the very first time after my marriage. On their day of arrival we had taken them to that same restaurant and they too loved it. But finally when i decided to do it at home, I was scared to prepare such a dish which was every bodies favorite and was worried if i can stand up to my expectations. Luckily, my hard work payed off and everybody complimented me saying it is better than what they had tasted.
This recipe can be divided into 3 phases i.e., Gravy Preparation, Rice Preparation and Seasoning.
NOTE :
Take 3 onions vertically sliced and fry it in a 1 cup oil until it's color changes to brown.
Wash and clean Chicken/Mutton.
I was not a very big fan of dum biryani. One day, my husband took me to one of the best restaurant in Singapore called swadisht. We ordered malabar mutton biryani and it was so tasty that we forgot the entire world. Even after getting back home i was still thinking about this dish and had a question in my mind if i can also prepare it. I watched many youtube videos and read many sites with this recipe. Finally, i was ready with the recipe by combining the ingredients from all the videos and sites that i felt was suitable.
My Father loves this a lot. And i gave it a first try when he had come to my house to Singapore for the very first time after my marriage. On their day of arrival we had taken them to that same restaurant and they too loved it. But finally when i decided to do it at home, I was scared to prepare such a dish which was every bodies favorite and was worried if i can stand up to my expectations. Luckily, my hard work payed off and everybody complimented me saying it is better than what they had tasted.
This recipe can be divided into 3 phases i.e., Gravy Preparation, Rice Preparation and Seasoning.
NOTE :
- Chilies can be added as per your taste.
- We are not marinating Chicken/ Mutton here because we are not adding any water to the gravy and un-marinated chicken will help by leaving water while cooking.
- Marinated chicken will not leave water on cooking and if you still prefer to marinate then add little water to a gravy and allow it to boil.
- Basmati rice is well suited for any kinds of biryani.
- Optional Seasonings : Can add rasins, unsalted cashews, pineapple essence and saffron or food coloring if needed for seasoning. But i am not using them as it might make the biryani little sweeter and food coloring is not good for health.
Preparation Time : 15 Minutes
Cooking Time : 30 Minutes
Total Time : 45 Minutes
Cooking Time : 30 Minutes
Total Time : 45 Minutes
Ingredients:
Phase 1 : Gravy Preparation
Garlic
|
2 tbsp
|
Ginger
|
2 tbsp
|
Onion
|
4 finely chopped or vertically sliced
|
Chicken Masala
|
1 tbsp
|
Green Chilies
|
3-4 finely chopped
|
Mint Leaves / Pudina
|
1/4 Cup
|
Tomato
|
2 finely chopped
|
Coriander Leaves
|
1/2 cup
|
Garam Masala Powder
|
2 tbsp
|
Ghee
|
2 tbsp
|
Coriander Powder
|
1 tbsp
|
Lemon Juice
|
3/4th cup
|
Plain Yogurt / Curd
|
1 cup
|
Turmeric Powder
|
3/4th tbsp
|
Salt
|
as needed
|
Wash and clean Chicken/Mutton.
Method :
- Heat oil (i.e., left over after frying the onions) and ghee in a pan.
- Add onions, chopped ingredients, garlic, ginger paste, salt, tomatoes, coriander and turmeric powder. Mix well.
- Add chicken, chicken masala powder, mint and coriander leaves. Mix well.
- Now add yogurt/curd , lemon juice and garam masala.
- Cook on a low flame until thick masala is formed and chicken is cooked.
| Basmati Rice Grains / Normal Rice Grains | 3 cups |
| Boiling Water | 5 cups |
| Garam Masala Powder | 1 tbsp |
| Ghee | 2 tbsp |
| Salt | as needed |
Wash and clean Basmati Rice Grains.
Method :
- Heat ghee or oil in a pan.
- Add basmati rice grains and mix well on low flame.
- Add boiling water after 3 minutes, garam masala powder and salt.
- Cover with lid and on medium flame cook until water evaporates
| Fried Onions | 3 |
Method :
- Take a big pan. Add 1/3rd gravy into it.
- On the gravy layer, spread 1/3rd rice. Above it spread little fried onions and optional seasoning if needed.
- On fried onion layer spread gravy again. Above it rice and repeat this 2 times.
- Close the biryani vessel with a tight lid or Make a dough out of the wheat flour / maida with some water in the same way as you would do for chapati Close the vessel with the layered biryani and seal the edges of the lid with this dough. There should not be even the slightest opening and the briyani should cook and the flavors should meld together.
- Place a tawa or a frying pan on the lowest burner of your stove. The flame should be at the lowest setting. Place the biryani vessel on top of the frying pan and let cook for 20 minutes or so.
- Take the pan off the heat source. The smell will be amazing on opening the lid.
- Mix it up slightly if you want. Else use a long spoon to scoop out the layers right from the rice to the chicken onto a plate.
- Serve the biryani hot with some raitha, papad and a good pickle on the side.


Comments
Post a Comment